Tag: how to install windows
How To Setup a USB Flash Drive to Install Windows 10, 8, or 7
If you have a computer and would like to install Windows, you may be wondering how to do it without a clunky external DVD Drive. Today we show you how to install Windows from a USB flash drive.
Installing Windows 7, 8, or 10 from a flash drive is essentially the same as installing it from a DVD. Most of the work is setting up your flash drive so it becomes a bootable device with the OS on it. Here we will take a look at a couple of utilities that will allow you to easily create a bootable USB drive and copy Windows to it.
Note: You’ll need a minimum of a 4GB flash drive to dedicate to the installation files.
First, Download Windows USB/DVD Download Tool (for any version of Windows)
The neat thing about this utility is it also offers different advanced features and tasks for other versions of Windows too.First, Download Windows USB/DVD Download Tool (for any version of Windows)
First, you’ll need to download and install the tool from Microsoft’s website, and then you’ll need to make sure that you have an ISO image of Windows 7, 8, or 10. This also works with Vista or XP, of course, but most people wouldn’t be installing those these days.
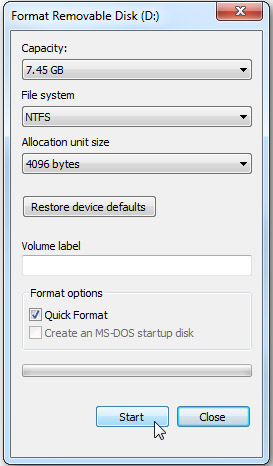
If you have issues using the tool, you might want to reformat your drive as NTFS beforehand, which you can do by right-cicking the drive icon in Windows Explorer.
Creating a USB Drive with the Windows Installer
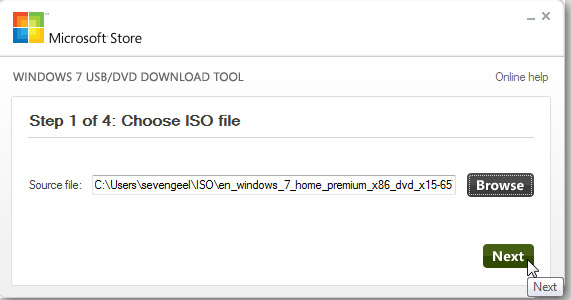
It’s a pretty straight forward process, first browse to the location of your Windows ISO file and click Next.
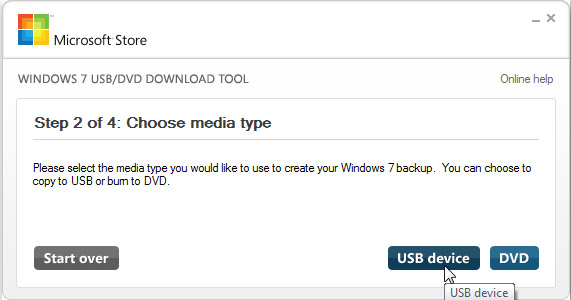
Select USB device…this also helps you burn the ISO to DVD as well if you need that option.
Choose your flash drive and click Begin copying.
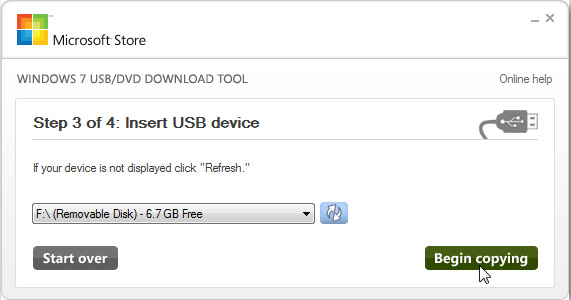
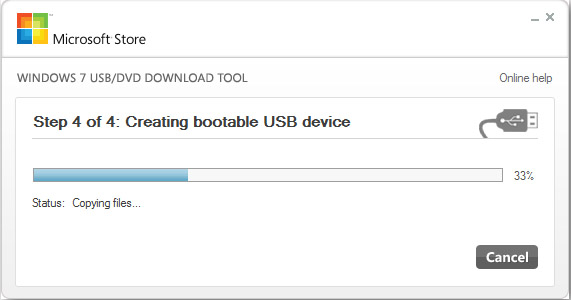
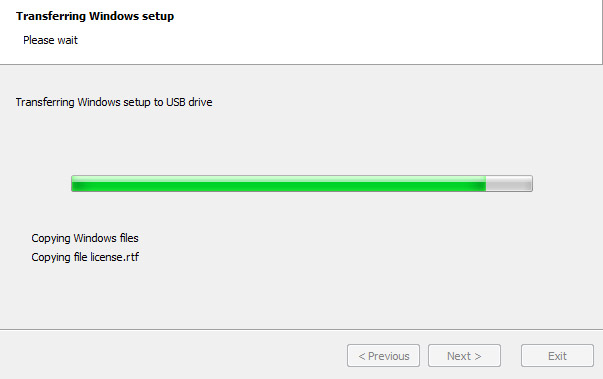
Now just wait for the process to complete. The drive will be formatted and files copied to the flash drive.
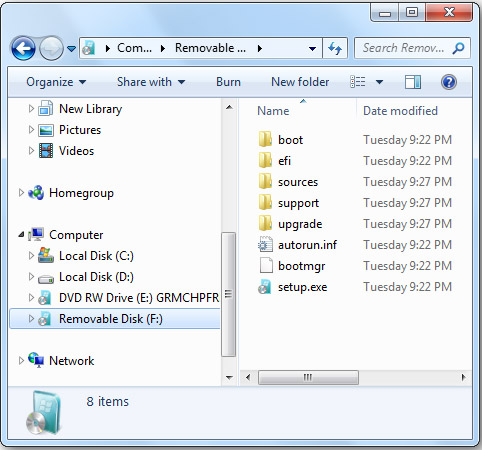
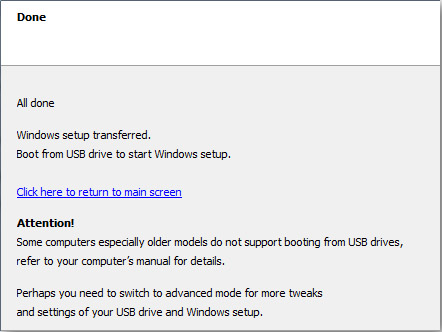
When the process is finished you will be able to see the files on the flash drive as you would if you opened the installation disc. Now you can start the installation on any computer that allows you to boot from a USB drive.
Select USB device…this also helps you burn the ISO to DVD as well if you need that option.
Choose your flash drive and click Begin copying.
Now just wait for the process to complete. The drive will be formatted and files copied to the flash drive.
When the process is finished you will be able to see the files on the flash drive as you would if you opened the installation disc. Now you can start the installation on any computer that allows you to boot from a USB drive.
WinToFlash
Update: this utility distributes adware so we’re not linking to it anymore.
If you want to transfer a Windows 7 installation disc to USB…another super easy utility to use is WinToFlash. Just follow through the straight forward wizard, and you’ll be ready to install Windows 7 from your flash drive in no time.
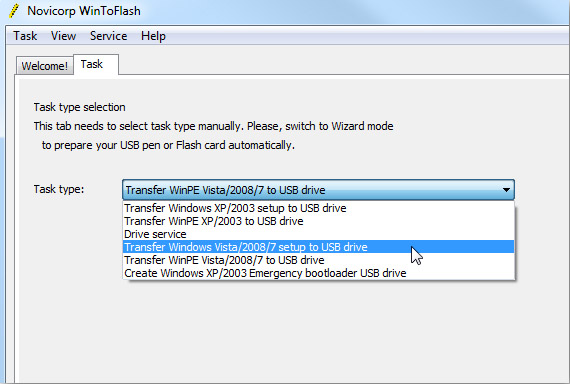
It’s as easy as choosing the location of the Windows installation disc and the USB drive. Where in this example the DVD is drive (E:) and the flash drive is (F:). They recommend to turn off your Antivirus to increase the process speed, but we had MSE running on our machine and it didn’t seem to affect performance at all.

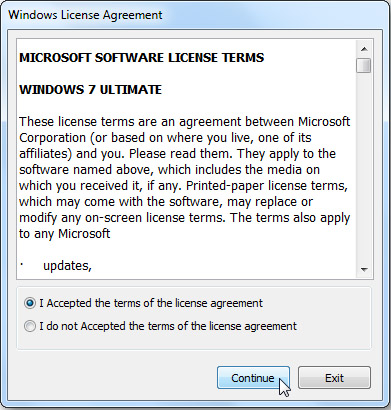
Next, you’ll need to agree to the Windows 7 EULA and hit continue.
Now just wait until the drive is formatted and the files are transferred over to the USB drive. The amount of time it takes will vary between systems. In our test it took around 10 minutes to complete over to an 8GB flash drive.
That’s it! Now the drive is ready so you can install Windows 7 on your netbook or any other computer that supports booting from a USB drive.
Conclusion
WinToFlash is still in Beta and doesn’t require installation to use. Microsoft’s tool apparently became Open Sourced recently, requires installation, and a few other requirements like .NET Framework. Both of these tools are free and each one works a bit differently, so you’ll need to decide which will work best in your situation. If you don’t want to manually create a bootable flash drive and copy the install files over, then you might want to check out these extremely simple to use utilities.
Download WinToFlash (Because there is adware in this application we’ve removed the link)
Download Windows 7 USB/DVD Download Tool
Download Windows 7 USB/DVD Download Tool


 Contact Us:info@UUdesktop.com